Procedural Terrain Generation
Adjust the settings to see how they affect terrain generation. To generate a new world with the same settings, press the "New Seed" button.
This demo shows off procedural terrain generation based on simple multi-layered Perlin noise. Perlin noise is an algorithm for generating smooth-looking noise. This noise can be used as height data to generate landscapes, where the black parts of the image are low and the white parts are high.
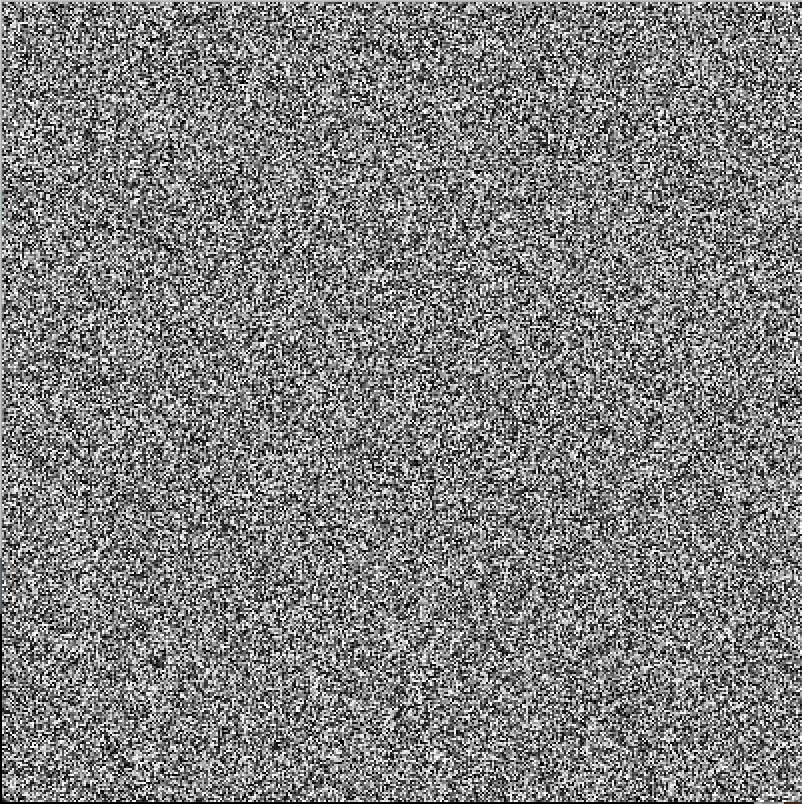

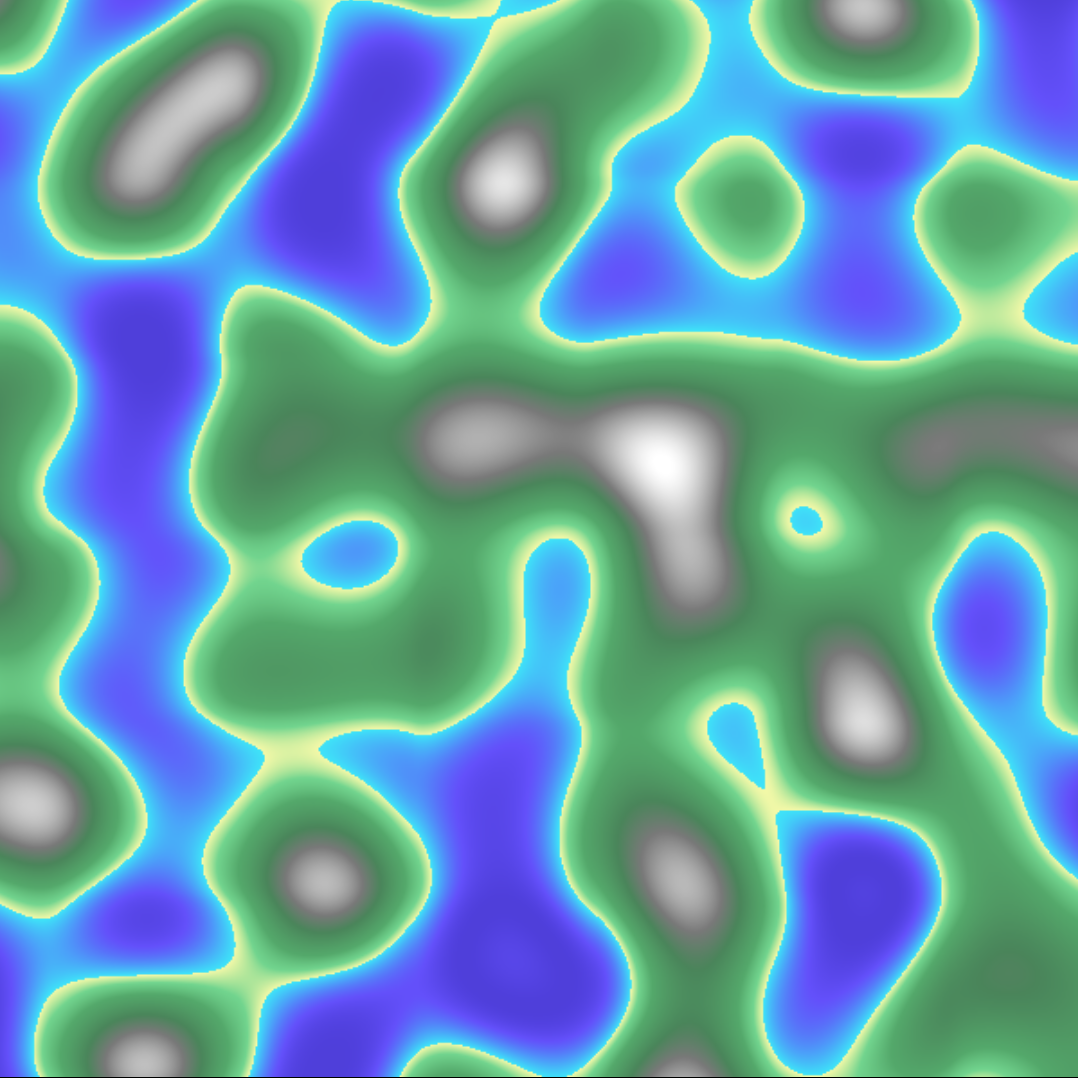
Normal noise (left) vs Perlin noise (middle) vs colored Perlin noise (right). Perlin noise interpolates between values so it looks smoother, and can be used as a source of height data for artificial terrain.
Perlin noise begins to resemble real terrain as more layers are added. Each layer is more detailed than the last layer and contributes less to the overall texture.
The Settings
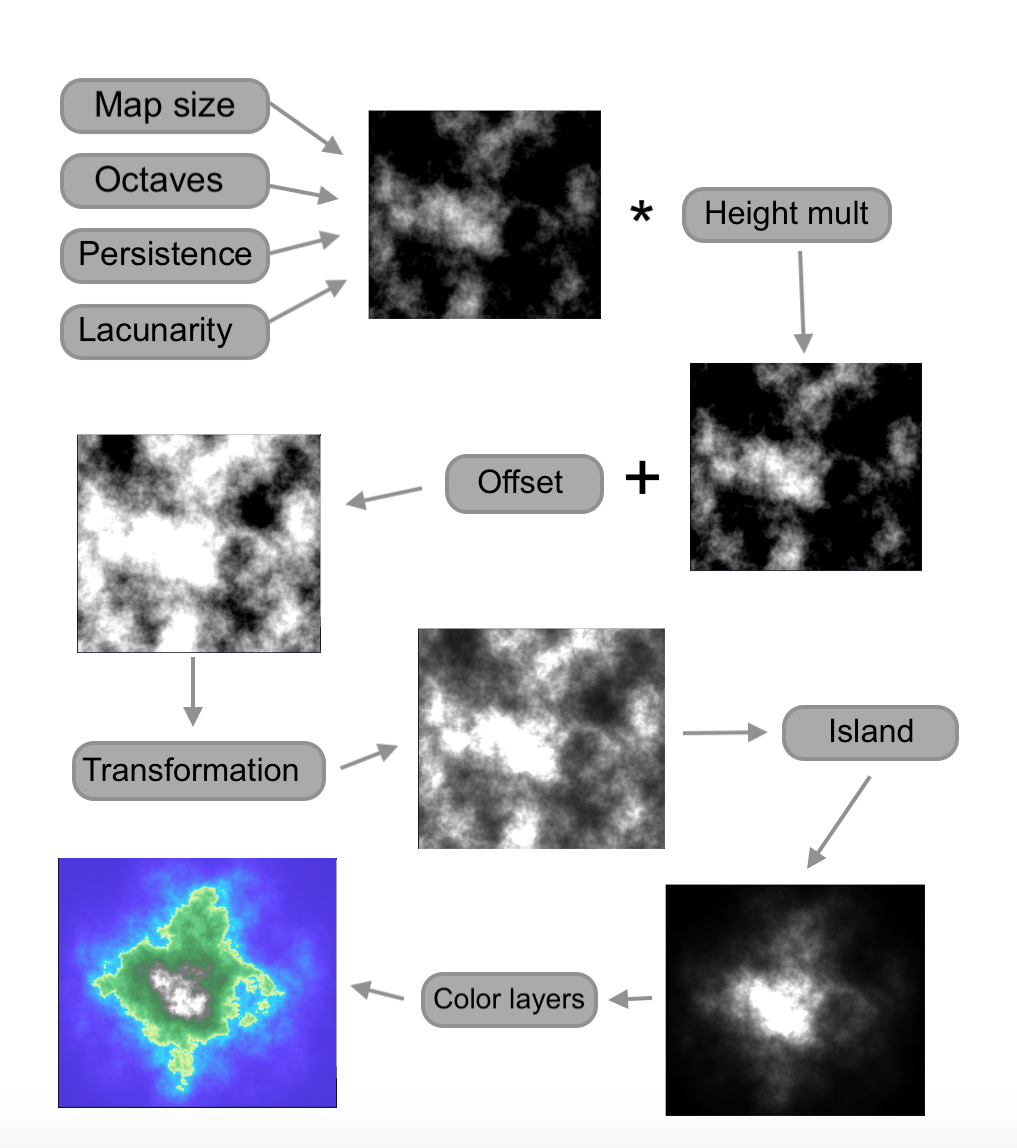
Before describing each setting, I'll give an overview of how this demo generates terrain. Each step will get a more detailed description later. First, a multi-layered Perlin noise texture like the one above is generated using the "Map size", "Octaves", "Persistence", and "Lacunarity" settings. Then, each height is multiplied by "Height mult", added to "Offset", and then used as the argument for a function defined by the "Transformation" dropdown and its sub-parameters. Then, if the "Island" box is checked, the heights near the edge of the screen are decreased. Finally, each point is assigned a color based on its height and the positions of the "Color layers" sliders.Map size - This number determines the level of detail of the first texture in the multi-layer Perlin noise generation. A high value creates a more detailed texture, which gives the appearance of a larger map.
Color layers - These sliders determine how each point is assigned a color at the end of the process. Each slider has a color attached to it, and lowering the slider means that the associated color will begin to appear at lower heights.
Octaves - This is the number of layers in the multi-layer Perlin noise. Higher values create more fine detail but make generation slower.
Persistence - This number determines how quickly successive layers of noise decrease in amplitude. A value of 2 means each layer contributes half as much as the layer before it, a value of 3 means a third, and so on. A value of less than one makes each layer contribute more than the previous layer, which causes some strange results.
Lacunarity - This number determines how quickly successive layers of noise increase in detail. A value of 2 means each layer is twice as detailed as the one before, 3 means three times as detailed, and so on.
Height mult and Offset - Before the "Transformation" setting is applied, each height is multiplied by "Height mult" and added to "Offset". The effects are obvious when you adjust them and it gives you an extra degree of control.
Island - This setting is applied right before the points are colored. If the box is checked, points far from the center of the map are multipled by increasingly small values, so the map slopes down into the ocean, creating an island or an island chain.
Transformation - This dropdown and its sub-parameters define a function which transforms the height value after it's added to "Offset". You don't really need to understand the functions or their parameters, as they just give you more values to play with to experiment with different looks. Still, as an example, the default transformation is "Polynomial" with the degree set to 2. This squares the height value. Degree 3 would cube the height value.
Here's a rough flowchart that summarizes the process: